 |
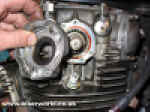
8. With the points assembly, auto advance and crossover shaft removed the two housings can be removed from each side of the head. Each housing carries an oil seal which runs on the camshaft itself. These oil seals will be replaced during the rebuild along with the gaskets and "O" rings which seal the housings against the cylinder head. |
| |
|
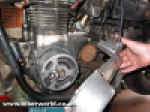 |
9. I'm not going to disturb the rest of the top end until the engine is out of the bike and on the workbench, so at this stage I turn my attention to the side covers. The more I dismantle, the lighter the engine will be when I come to lift it out of the frame. On the left side the engine cover lifts away to reveal the generator unit and drive sprocket. The generator stator is retained in place with two long phillips screws, with these removed and the electrical connector unplugged the stator can be lifted away and carefully stored. I'll leave the drive chain on the gearbox sprocket at this stage as it will allow me to lock the engine with the rear brake, useful when unfastening the clutch centre nut and primary drive gear. |
| |
|
 |
10. On the engines right side now, the first step is to remove the oil filter cover and filter. The filter is a washable gauze type and can be cleaned in paraffin and dried off with compressed air before refitting later. The brake pedal and right hand footrest come off next, which allows room to remove all the screws and lift the cover away. I had to give the front of the cover a couple of light taps with a hammer to break the gasket seal. The tacho cable should also be disconnected at this stage. |
| |
|
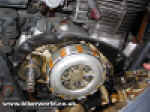 |
11. Removing the right hand cover reveals the clutch and primary drive assembly. Unusually the XS650 engine carries its oil pump mounted inside the engine cover, driven off a gear from the primary drive. This gear also drives the tacho cable. I'll take a close look at the oil pump later. The clutch assembly will have to be removed to gain access to the gear selector mechanism behind it. |
| |
|
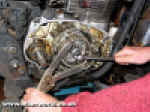 |
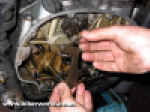
12. With the clutch springs, pressure plate and friction plates removed the whole clutch assembly is held on the end of the input shaft with a single nut retained with a locktab. This nut is tight, and some means of stopping the clutch drum from rotating is useful whilst undoing it. Not for the first time I'm resorting to my trusty Kawasaki service tool, a rather crude device fabricated from two steel claws welded onto a pair of Mole grips. Not a difficult thing to copy if you wanted to make your own. Alternatively a couple of old clutch plates could be drilled and bolted together, effectively allowing you to lock the inner and outer drums together. A foot on the rear brake pedal with the bike in gear should then hold everything steady. |
| |
|
 |
13. With the clutch removed the kickstarter mechanism can be lifted away, giving full access to the gear selector. The selector claw unhooks from the end of the drum and then slides out of the crankcase. Watch for the small springs that hold it in contact with the drum. Now is a good time to remove the detent roller and spring that clicks the selector drum into position. Watch also for any shims and washers on the input shaft, these will need to re-fitted in the same order during the rebuild. |
| |
|
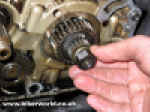 |
14. Releasing this nut from the end of the crankshaft permits removal of the primary drive and oil pump drive gears, which should simply slide off. The primary drive gear is located onto the crank with a woodruffe key, collect it and store it safely for later. |
| |
|
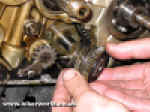 |
15. The starter bendix assembly can now be released and lifted off its shaft. On the XS650 the starter motor is bolted underneath the rear of the crankcase and drive is transmitted to the bendix by a crossover shaft, seen here just to the left of the bendix. The crossover shaft has a splined gear at each end which simply push on to the shaft, the whole thing being located by the small catch plate and single screw seen here. Be careful if you're not intending to strip the engine completely; if you remove the catch plate and slide out the crossover shaft it will be almost impossible to slide it back into engagement. |
| |
|
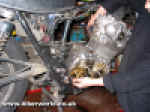 |
16. Now at last I'm ready to remove the engine from the frame. First I make final check round the bike to make sure I've disconnected all electrical connections and control cables. Surprisingly all the engine bolts loosened off without too much trouble, and with the engine plates removed the engine lifts up and clear from the right side of the frame. I was working alone at this point but the assistance of another pair of hands is always useful when lifting an engine out. |


![]()